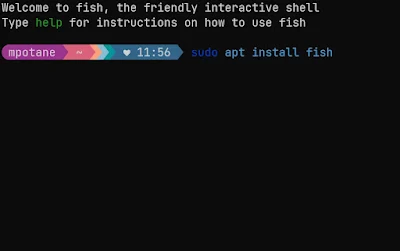
Let's talk about why fish. Why not use zsh?
- Smart and user-friendly
- powerful features such as syntax highlighting, autosuggestions, and tab completions that simply work out of the box.
- No need to learn works without configuration (beginner-friendly).
First, we need to install fish using the command:
# This will install fish and its dependencies.
sudo apt install fish
Now we need to set fish-shell as our default shell.
copy this command at the end of the line.
# This will tell us the path of fish binary
# Copy it in the clipboard
which fish
# Use command sudo chsh -s <paste path of fish shell> <your username>
# Just like:
sudo chsh -s /usr/bin/fish username
Note: Restart your terminal and see if it works.
Now we have fish as our default shell.
I previously stated that configuration is optional. Nonetheless, I will show you how to configure it so that we have a less-boring shell.
How to inherit the system-wide environment variables on startup, from bash?
Using the package bass we can solve just that. First, we need to install a plugin manager in Fish called Fisher from git.io/fisher.
# This will install fisher plugin manager for us.
curl -sL https://git.io/fisher | source && fisher install jorgebucaran/fisher
After installing we can now:
# this will update fisher as well as the plugins installed.
fisher update
Next, we will install bass from https://github.com/edc/bass. To do this we just use Fisher like this:
fisher install edc/bass
To use bass we can configure fish like so:
🖊️ Copy the command in .config/fish/config.fish
# Inherit system-wide environment variables.
bass source /etc/profile
That completes the configuration.
Other notable plugins we can use:
# Autopair brackets & qoutes.
fisher install jorgebucaran/autopair.fish
# Jump to folder easily.
fisher install jethrokuan/z
How to style fish using the starship cross-shell prompt?
Finally, we have come to the last part of this tutorial.
Have you noticed how attractive my shell is in comparison to yours? That's because I'm using a Starship preset. This will be quick, so follow me again.
To install it we use:
# This will install the latest package in your local bin directory.
curl -sS https://starship.rs/install.sh | sh -s -- --bin-dir ~/.local/bin/
Next, we need to initialize it using our shell.
# Add this to your fish config.
starship init fish | source
Setting up the preset from starship.rs
# Copy this command and we are good to go.
starship preset pastel-powerline > ~/.config/starship.toml
- Additional plugin for fisher
fisher install jorgebucaran/nvm.fish
👏 Excellent job!
Note: Restart your terminal to make sure all changes take effect.
Don't forget to follow 🌏 my socials and subscribe to my 💌 newsletter.


What font do you use from this SS
ReplyDeletehttps://blogger.googleusercontent.com/img/b/R29vZ2xl/AVvXsEjhViAqsWJ32tbQFj75PrCSOpLHm2Ou4p_q5LpDekD8M6h1AbN0tnURpaHlZzVVpWpEZDzaebxZUUEj-DUvlYI0RRB-eHwjS2J1DFpb3HB95RegspO4NbSDxBKfRFR8AXRsWMftvT-L0K4EnzXX3IwCRK25wu2x60wKpCVktROcYW3pXxOih6Xyr_iNKes/w400-h251-rw/44ef185e-b2f5-487c-a7ab-921381cc49f3.jpg
You mean the theme in the terminal, I use https://starship.rs/presets/pastel-powerline.html
DeleteFor the font in the terminal I use Jetbrains Mono Nerdfont
Delete